Deleting stuff in Page Builder Sandwich is usually done by simply selecting the text or element then hitting the delete or backspace button.
Another alternative is to click the delete / remove button on the inspector:
There are some cases where this doesn’t work. Items that won’t work are normally containers such as rows, columns or carousels. This is to prevent accidental deletes when deleting content.
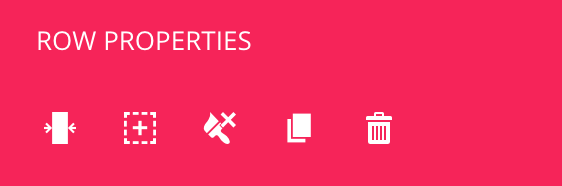
To delete those items, click on the delete / remove button on the element’s properties in the inspector. For example, to delete a row, you’ll have to use this area:
There are 2 ways you can embed content from other sites:
1. Embed By Pasting The URL
You can embed content from various sites like YouTube videos, Vimeo videos, Instagram photos, Flickr photos, Tweets and even Reddit comments by pasting their permalink URLs directly.
You can also install other plugins that add support for additional embed URLs. For example, Wistia URLs are not supported by WordPress out-of-the-box, you can install their plugin to enable embedding, afterwards, PB Sandwich should be able to also handle them.
Take note that one entire line of text should contain only the URL for this to work.
To allow you to work faster, you can use various shortcut keys available with Page Builder Sandwich.
Non-Formatting/Tool Shortcut Key Combinations
These are shortcuts for non-formatting/tool commands. For formatting/tool shortcut keys, hover your mouse over each button on the text formatting bar to view their shortcut key combination.
Shortcut Key
Description
CTRL+E (while not editing)
Start editing
CTRL+SHIFT+R (while editing)
Refresh page (since CTRL+R is used for right aligning)
Click on the HTML element in the Inspector to add a new HTML element, a modal window should appear. Type in or paste in your HTML code in there, then click on save HTML. Your HTML should now show up inside the editor.
Hover your mouse over the HTML element to show the toolbar. You can edit your HTML by clicking on the pencil icon in the toolbar, or by double clicking on the element itself.
In the premium version of Page Builder Sandwich, you can use your own SVG / vector icons. Here’s how:
Begin editing with Page Builder Sandwich.
Locate the SVG icon that you want to use in your desktop,
Make sure that the filename of the icon is descriptive, the name will be used for searching your icon later. e.g. “apple-mac-desktop”
Drag the file into the browser to upload it. (After you drop the file, the Media Manager will appear to begin the upload process. If it doesn’t appear, click on the “Add Media” element button in PBS’s inspector to open it, then upload your icon from there.)
Close the Media Manager window and click on the “Add Icon” element button to open the Icon Picker popup.
Search for your newly uploaded icon. e.g. if the filename of your icon is “apple-mac-desktop”, you can use the terms “apple”, “mac” or “desktop” to search for your icon.
Uploaded icons can also be used as bullet icons in bullet lists and button icons.
Note: If your icon doesn’t appear in your searches, it might be that the filename wasn’t properly parsed by PBS. In those cases, you can use the terms “custom” or “upload” to find your uploaded icons.
Optionally highlight some text, then click on the button element in the inspector. This should bring up a modal where you can type in the URL to link to for your button. You can also search for any existing webpage that you have in your website from there.
Unlike the other elements, buttons are placed inline, which means that they will be placed alongside other text (or other buttons). You cannot drag and drop individual buttons to other locations, but instead drag the button along with the text surrounding it.
While editing, when you click on a button, you will be able to see additional styling options in the inspector. You can also hover your mouse over buttons to see the URL they link to, and other commands.
Useful In
Linking to other pages
“Read more” or “Learn more” links
Landing page headings with 1 or more call-to-action buttons
Adding widgets can be done by clicking the Widget Element button in the Elements section in the inspector. Upon clicking, a popup should appear that lists all the widgets Page Builder Sandwich has found in your site.
Why Some Widget Options May Not Work Properly
All widgets found in your WordPress site can be added, however some widgets that use customized/specialized Javascript code within their settings might not work properly. Widgets that use these might not work:
Color pickers aside from the one included in WordPress
File uploader options that do not use WordPress’ Media Manager
Other special scripts like interactive map pickers, font pickers,
Javascript code that triggers when a setting changes values, etc.
The default WordPress widgets and similarly created widgets should have no problem.
How to Work Around This
If you really need that specific widget to work, there is a work around this.
You can use the plugin Custom Sidebars by WPMU Dev to create a new sidebar/widget area, add your widget in there using the normal method in Appearance > Widgets. Then in Page Builder Sandwich, add a Sidebar Element and select the sidebar that contains the widget that you need.
Another alternative is to re-create the effect you want using the various elements and styles available in Page Builder Sandwich.
Shortcodes can be pasted or typed in directly while editing. After you’ve typed in your shortcode, press enter or navigate out the shortcode and it should show up in its rendered form right away.
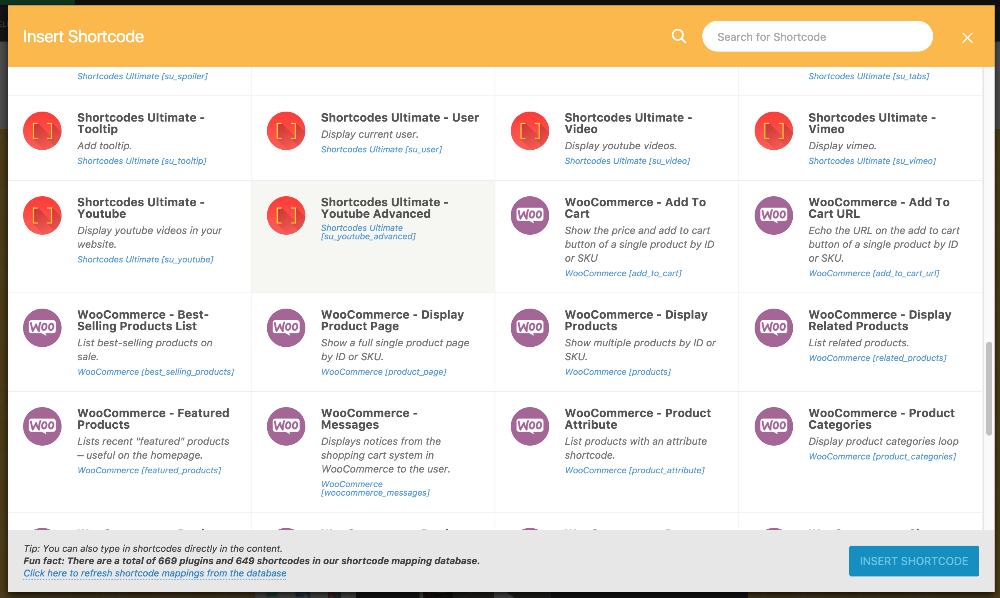
Another way of adding shortcodes is to click on the Shortcode Element on your inspector. This will bring up a popup that lists all the shortcodes available in your site. Select one or double click on any of them to insert it.
Editing Shortcodes
You can edit shortcodes in 2 ways:
Click on the shortcode to select it and edit the shortcode properties in your inspector. If there are attributes & content in your shortcode, then those should appear as fields that you can change. The shortcode should update automatically with your changes.
Double click on the shortcode (or hover your mouse over it then click on the edit toolbar button) to edit the raw shortcode. You can freely modify the whole shortcode this way. When you’re done, press enter or select another element to update the shortcode.
Where are my Shortcode Attributes?
Shortcode attributes cannot be detected by Page Builder Sandwich. So you will have to type those in. We are working on a way to map shortcodes into the system to make it easy for everyone. Stay tuned for that one.
Page Builder Sandwich is not like your typical page builder, it’s uncomplicated and simple to use.
You can view the video below for a quick tour.
Where Is The Editor?
First, create a new page, post or CPT. Then visit your new post or any existing one in your frontend. PBS is 100% frontend, you won’t have to tinker around in the backend.
There should be a “Page Builder Sandwich” button on the top of your page (on your admin bar), click on that to start editing. You should see the text formatting area pop up from the top, and the add elements panel pop up from the side. The content area of your theme is now your editor!
You can only edit single pages with PBS. You can’t edit a list of blog posts, or a 404 page since those are created by your theme. Posts, pages and custom post types are okay.
Editing Your Content
Now here comes the awesome part.. once you are in the frontend and inside the editor, click any text in your content or click inside your content area and start typing! Unlike other page builders, PBS allows you to directly edit content without the need to go through popup dialog boxes.
Formatting Your Content / Making Stuff Look Pretty
While editing, the area on the top is called the Text Formatting Bar. This bar contains all the formatting tools that you will use for styling text like: colors, bold, italicize, alignments, adding links, bullets and more. Hover over each button to find out what the tool does.
Adding Elements
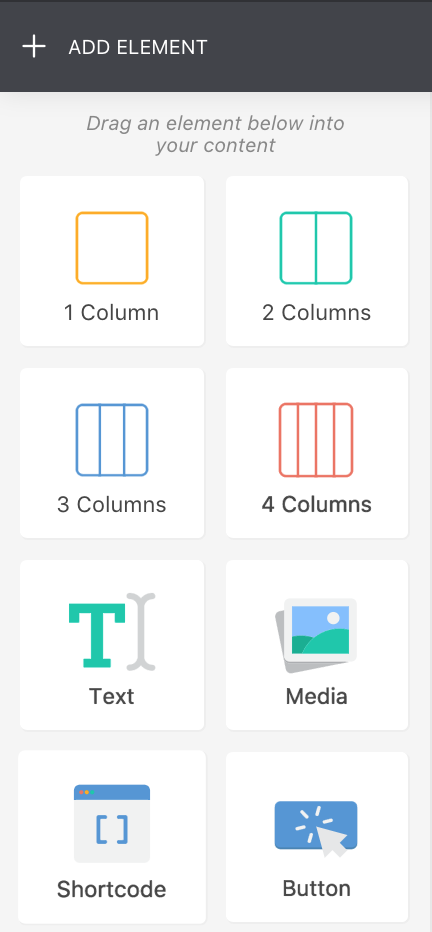
Hover your mouse over the Add Elements button on the upper left of the screen to show the Add Element Panel. You can also just move your mouse to the left side of the screen to make it show up.
To insert any element, hold down your mouse on one, then drag it into your content area. The area where the element would be placed would become highlighted. Release your mouse button to place the element.
Styling and Modifying Elements
Hover your mouse over any element that you have in your content and then outlines and toolbars should appear over them.
You can hover your mouse over the edges of the outlines to increase/decrease margins between elements.
You can also click on a button on the toolbar to perform quick actions on the element. Clicking on the gear icon on the toolbar would bring up the Properties Inspector which contains more options.
The Properties Inspector
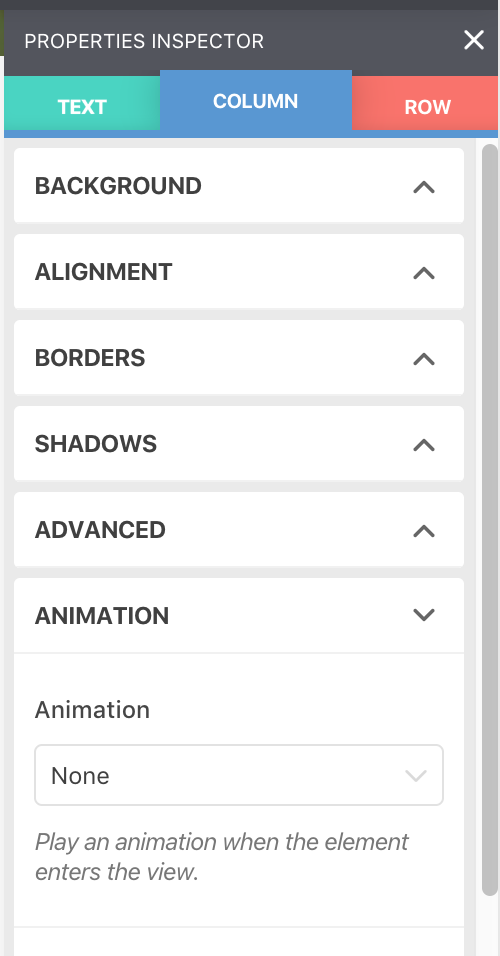
The properties inspector gives you more control over the looks of your elements. You can add a lot of things like shadows, animations, change map colors, border radius, and plenty more.
You can also access the properties of the parents of element. For example, if you placed an image inside a column and opened up the properties inspector, then you can access the properties of the image, the column it’s contained in, and the row which the column is contained in.
The properties inspector contains a lot of different settings for different elements, so be sure to check them all out.
Using Shortcodes
Page Builder Sandwich shows you actual shortcodes in the frontend, and you can edit them easily too!
If you have memorized your shortcodes, you can insert shortcodes by typing them directly in your content. But if you haven’t memorized them all (who does that?) the inspector lists all the shortcodes available in your site. Drag a Shortcode button from the inspector into your content area and find the one you want to insert, click on that to insert it.
Shortcodes get rendered into actual content in the frontend, to edit them, you can select it and check out their attributes in the inspector. Or for more control, you can double click on the shortcode to edit it in raw form. After performing your edits, your shortcode will update to reflect the changes.
Rearranging Your Content
You can click and drag anything and move them anywhere with PBS. When you drag something, move it on top of another element in the page, you can either move them above or below any other content.
Saving Your Work
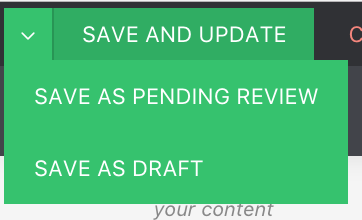
Once you’re satisfied with your design, just click on the save button on the top left of your page. That’s it!



 You can hover your mouse over the edges of the outlines to increase/decrease margins between elements.